|
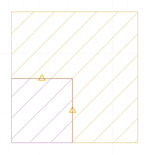
CYPECAD MEP does not allow users, for the time being, to directly introduce double-height rooms. Nonetheless, these type of rooms can be modelled by introducing floor slabs with an elevation change between them. To do so, go to the floor above the floor which contains the double-height space and introduce the floor slab of that floor and the floor slab which corresponds to the top floor slab of the double-height space.
Once the floor slabs have been introduced, indicate the difference in elevation between the floor slab of the space and the floor slab of the rest of the floor using the  button (Introduce elevation changes in horizontal partitions), which can be found in the Construction elements > Floor slabs menu. button (Introduce elevation changes in horizontal partitions), which can be found in the Construction elements > Floor slabs menu.
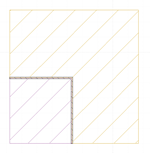
Since this floor slab is the ceiling of the double-height space, there is no need to introduce this part of the floor slab in the following level because by applying the elevation change, the ceiling of the double-height space is also the floor slab of the next level.
-
Floor above the floor in which the double-height space is located

- Next floor (containing the ceiling of the double-height space)

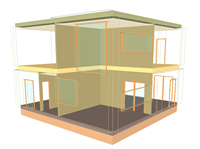
 Finally, introduce the walls that close-off the double-height space. To do so, go to the floor containing the double-height space and click on Construction elements > Close elevation change. Once introduced, so spaces can be defined, introduce the partitions, overlapping the elevation closings that have just been introduced, using the option: Construction elements > Walls and partitions. Since the elevation change that has been introduced is the height of the floor, these walls and partitions have only been introduced to establish the boundary of the spaces and therefore, neither appear nor are taken into account in the analysis of the building. Finally, introduce the walls that close-off the double-height space. To do so, go to the floor containing the double-height space and click on Construction elements > Close elevation change. Once introduced, so spaces can be defined, introduce the partitions, overlapping the elevation closings that have just been introduced, using the option: Construction elements > Walls and partitions. Since the elevation change that has been introduced is the height of the floor, these walls and partitions have only been introduced to establish the boundary of the spaces and therefore, neither appear nor are taken into account in the analysis of the building.
Now introduce the remaining construction elements of the building and define the spaces.

|
 button (Introduce elevation changes in horizontal partitions), which can be found in the Construction elements > Floor slabs menu.


